In this guide, i’ll explain how to disassemble Acer Aspire V3-371 to
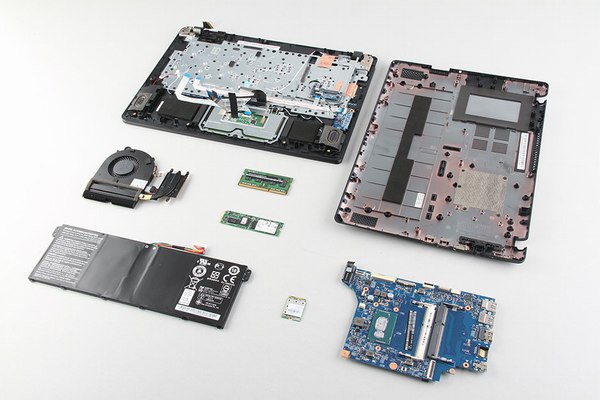
remove bottom case, battery, RAM memory, SSD, wireless lan card,
heatsink, cooling fan and motherboard, refer on this guide, you can
repair upgrade, clean cooling fan for your Aspire V3-371.
Acer Aspire V3-371 Teardown Step:
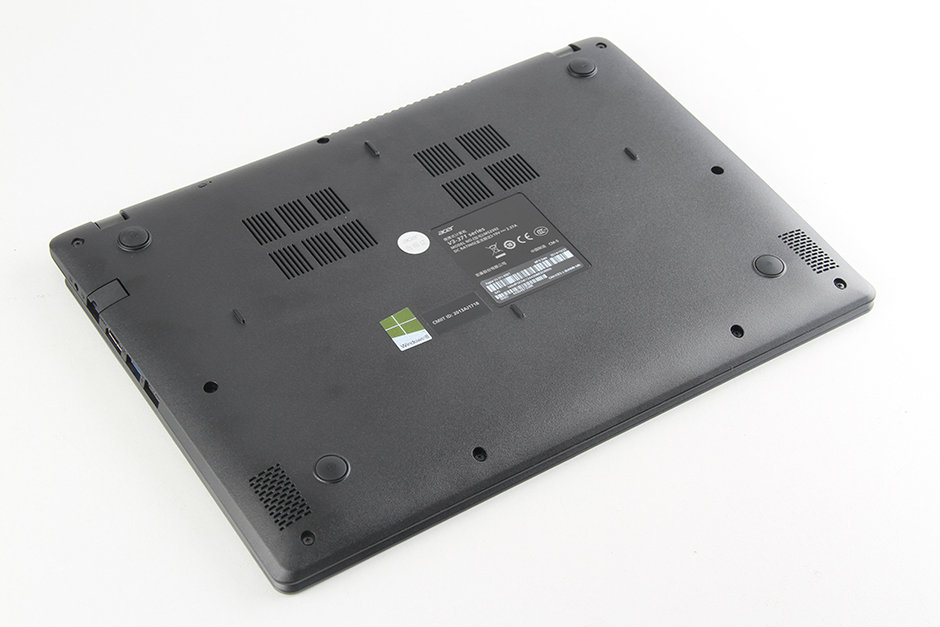
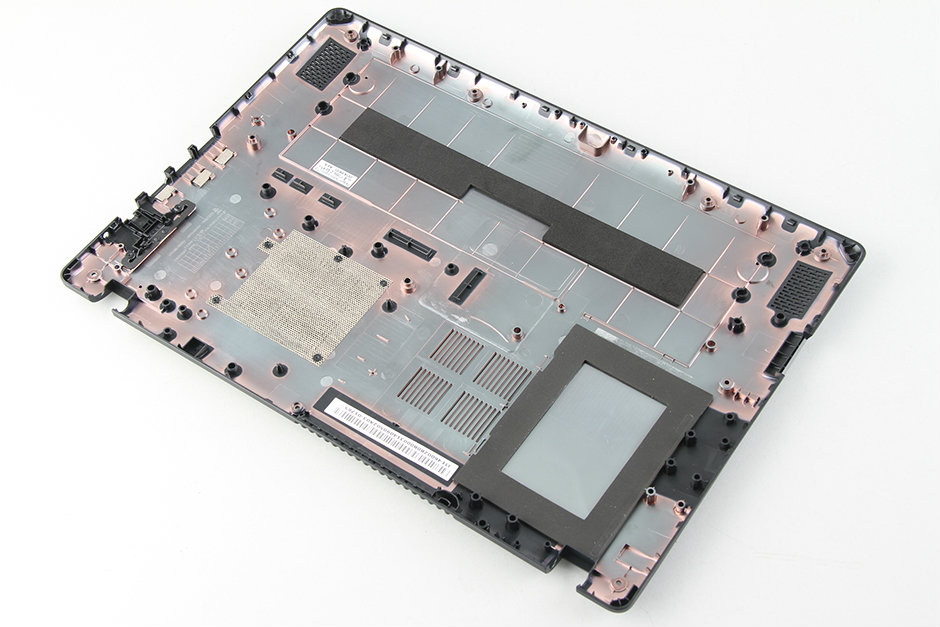
first at all, remove the all screws from bottom case

carefully pry up and remove the bottom case.
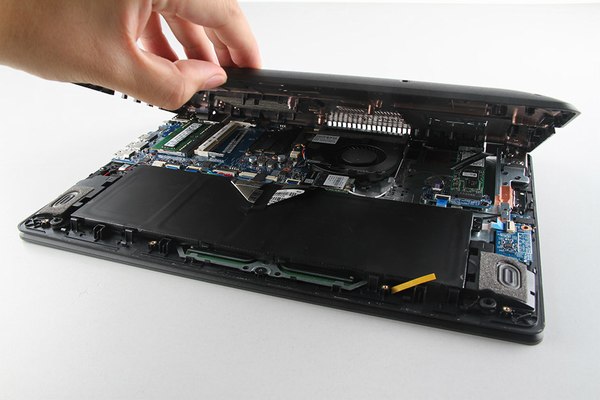
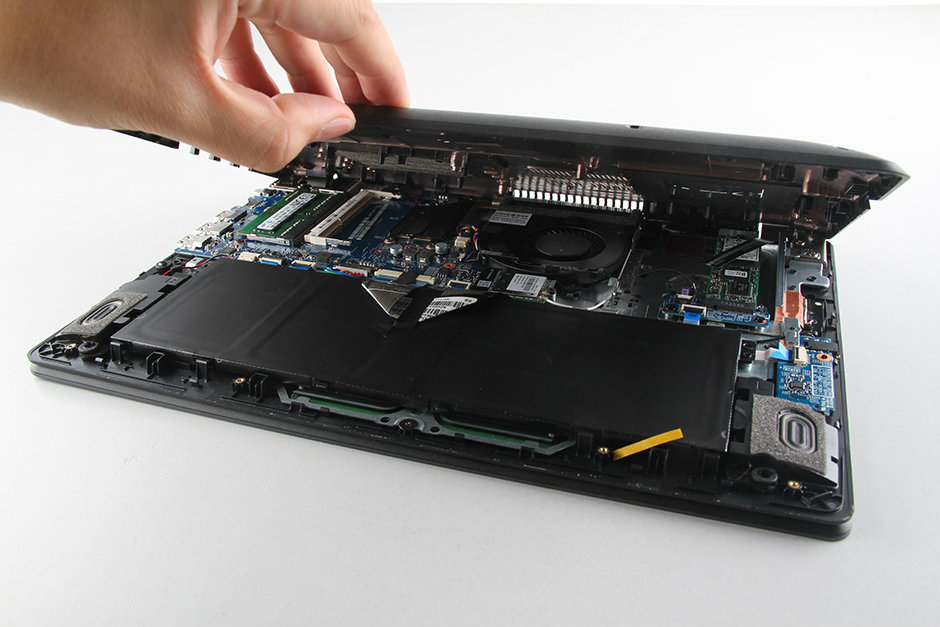
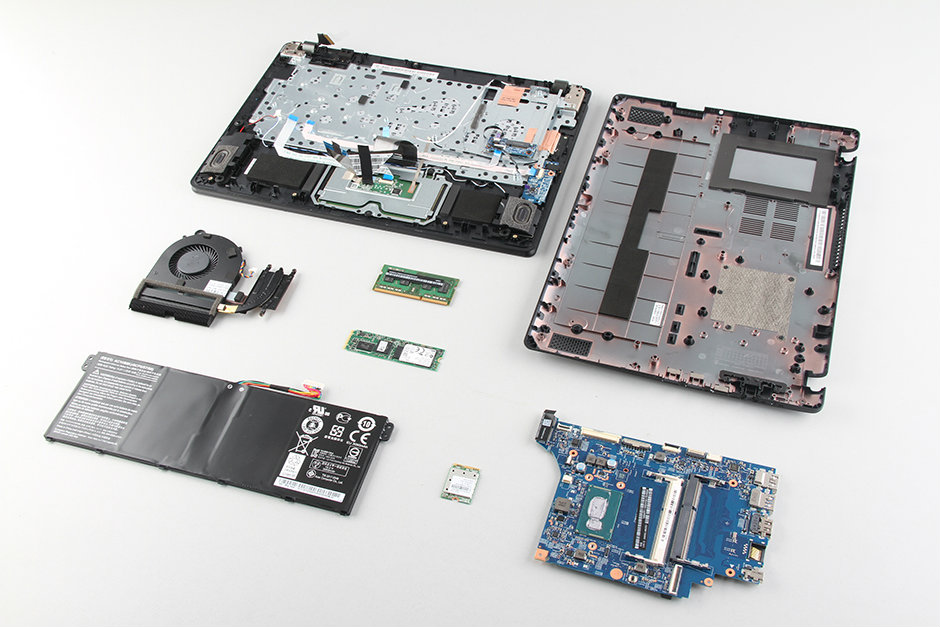
once the bottom case was removed, we can access the internal components of the Aspire V3-371
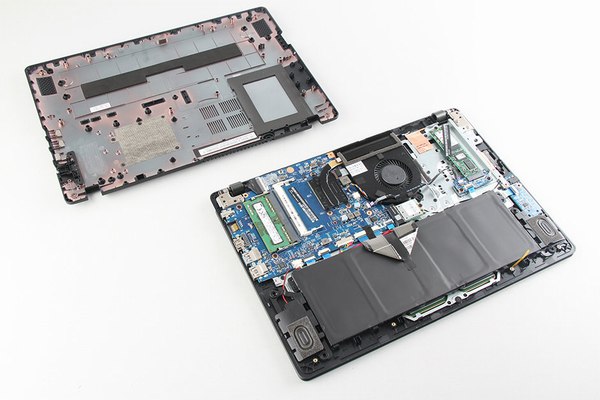
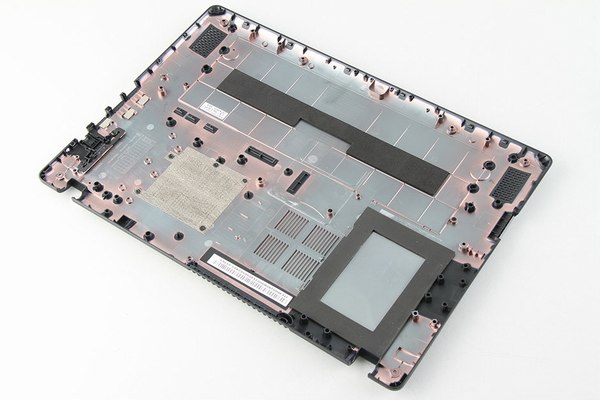
there are some Shock-absorbing sponges on the bottom case to protect battery and SSD.
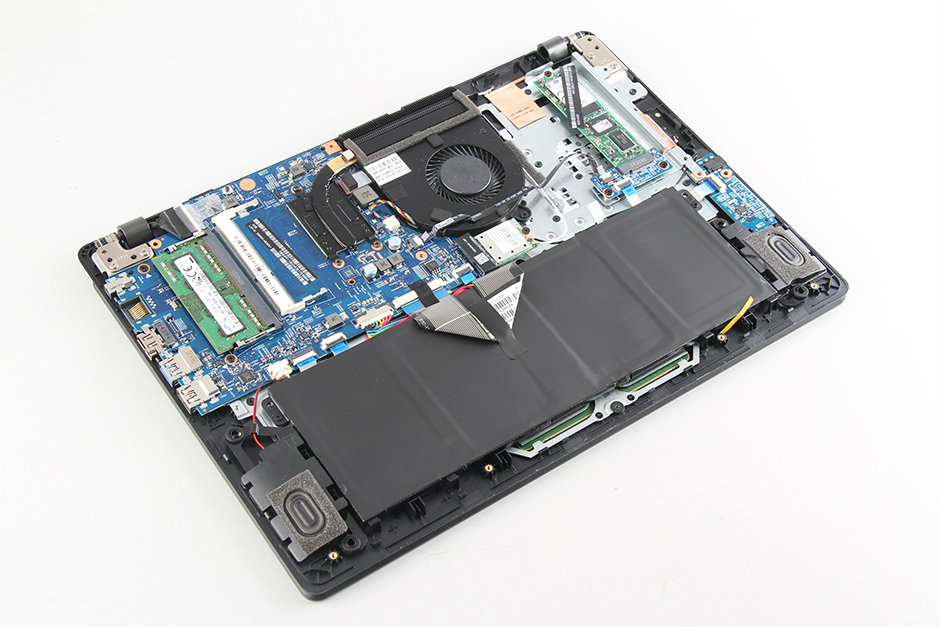
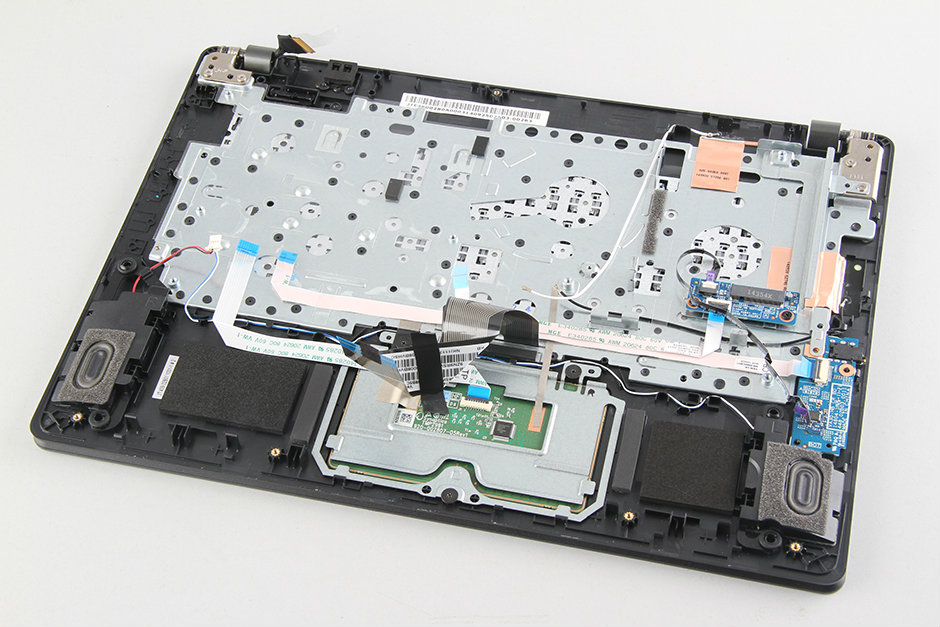
The internal structure of Aspire V3-371 is very neat, the keyboard cable fixed on the battery by black tape

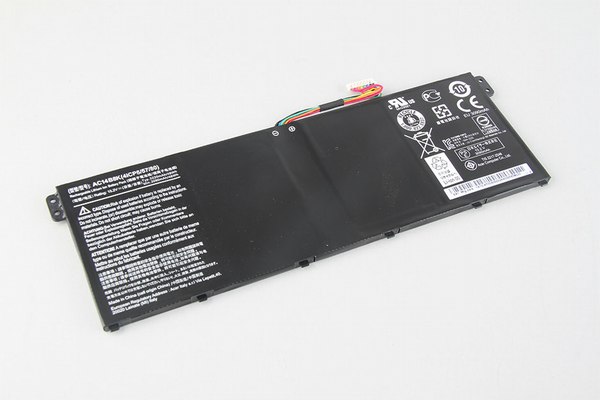
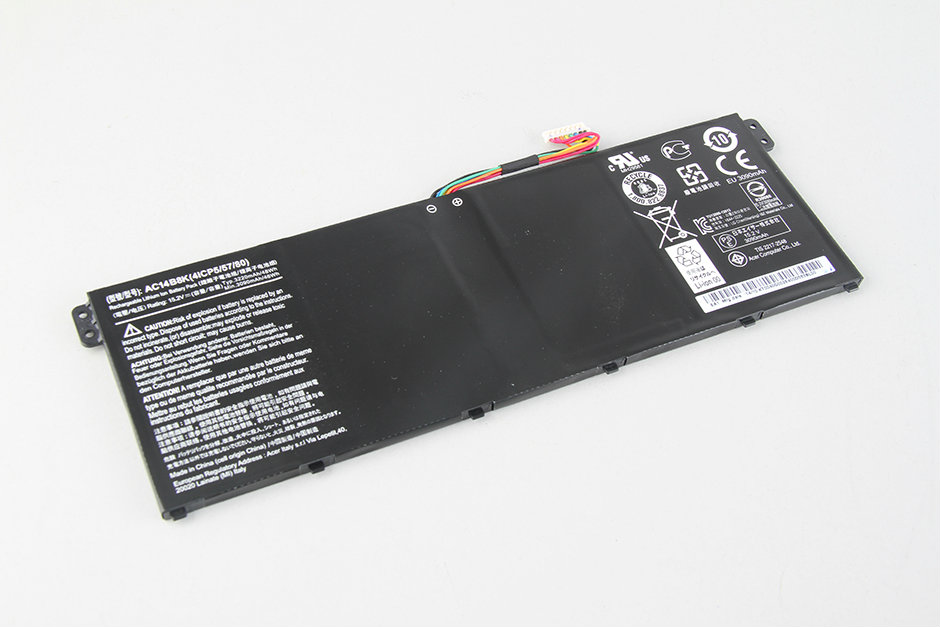
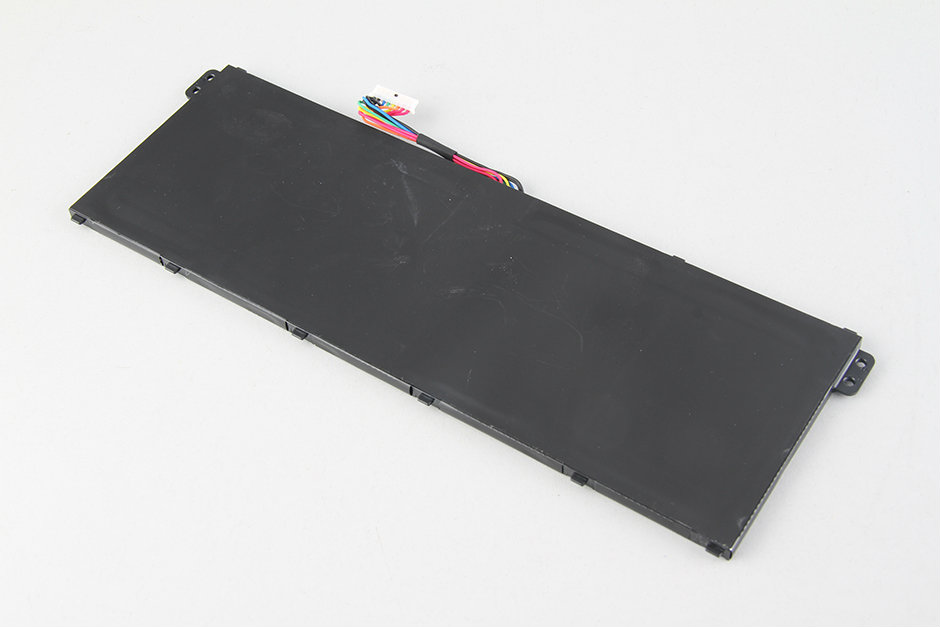
remove two screws securing the battery, disconnect the battery power cable, then remove the battery.
Acer Aspire V3-371 come with a 15.2v, 3200-3090mah, 48-46wh li-ion battery, acer p/n: AC14B8K

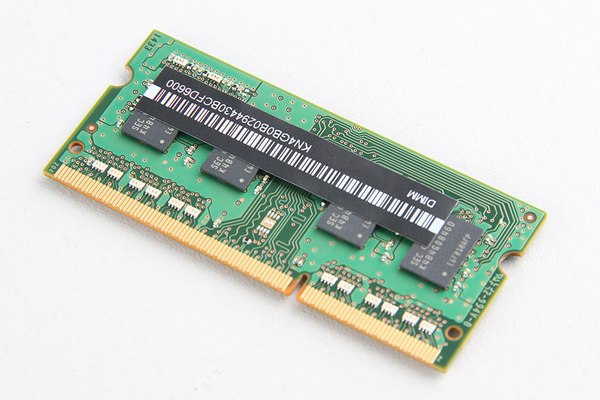
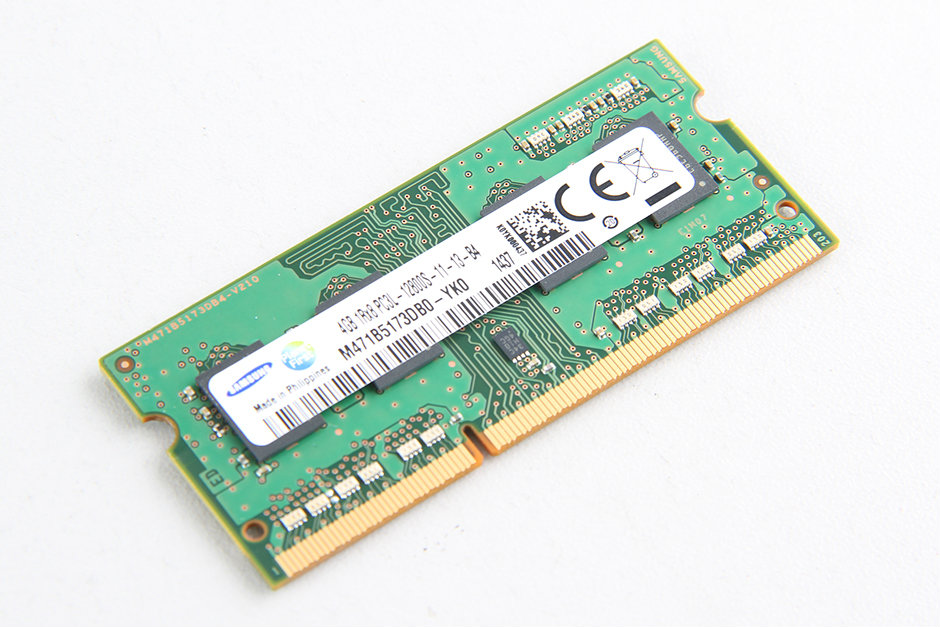
Acer Aspire V3-371 have two RAM slots, buy only one RAM was installed, so you can add another RAM

Samsung PC3L-12800S RAM memory

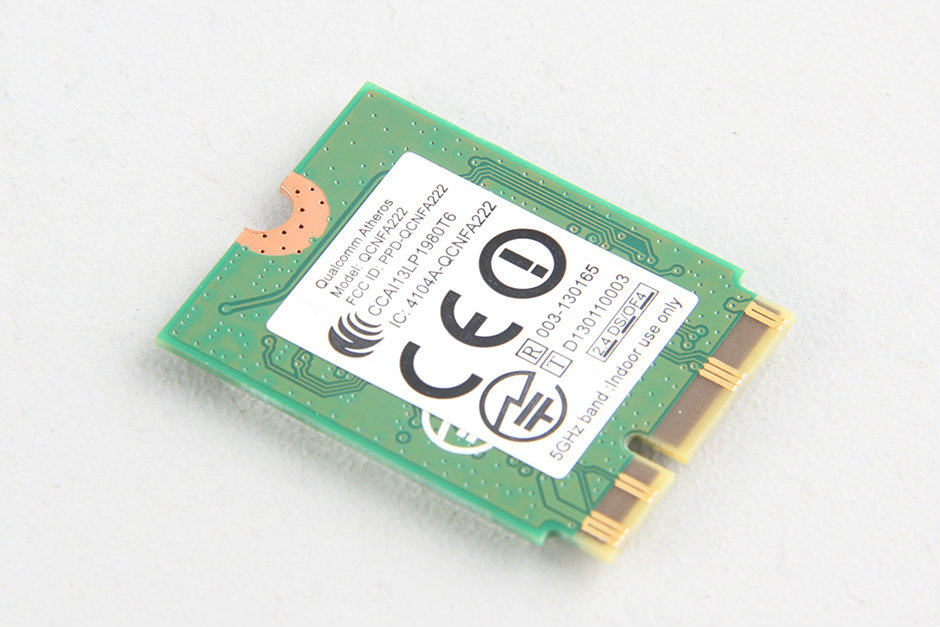
disconnect two antenna and remove one screw securing the wireless card, then take it away from its slot
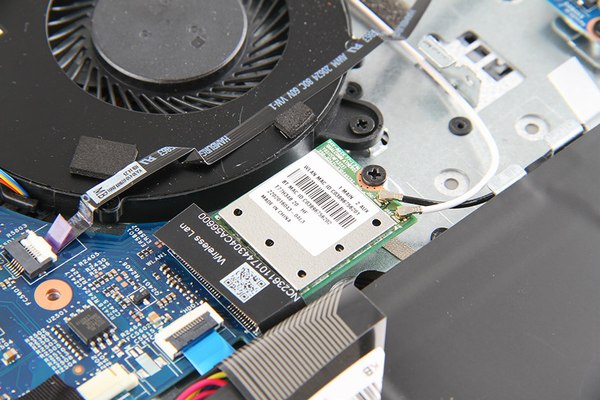
Wireless lan card model: T77H348.20
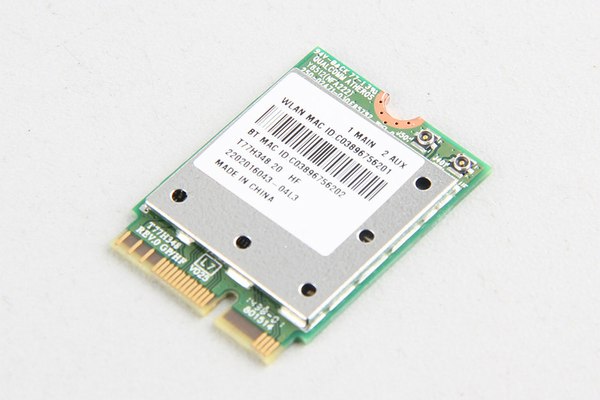
Qualcomm Atheros QCNFA222 wireless card

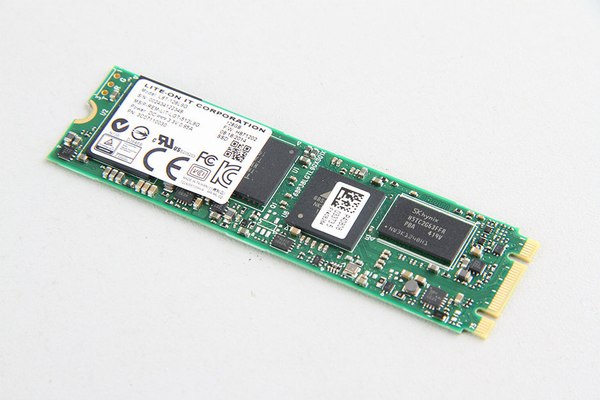
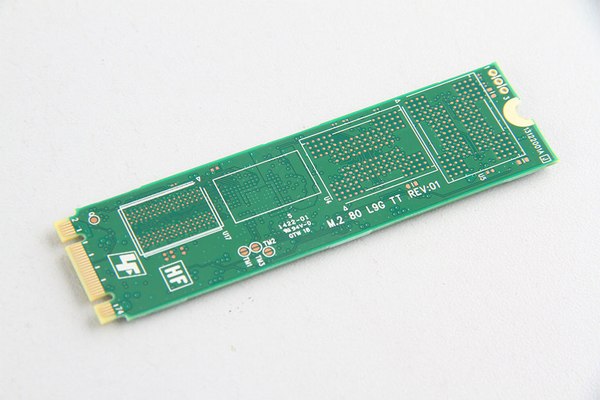
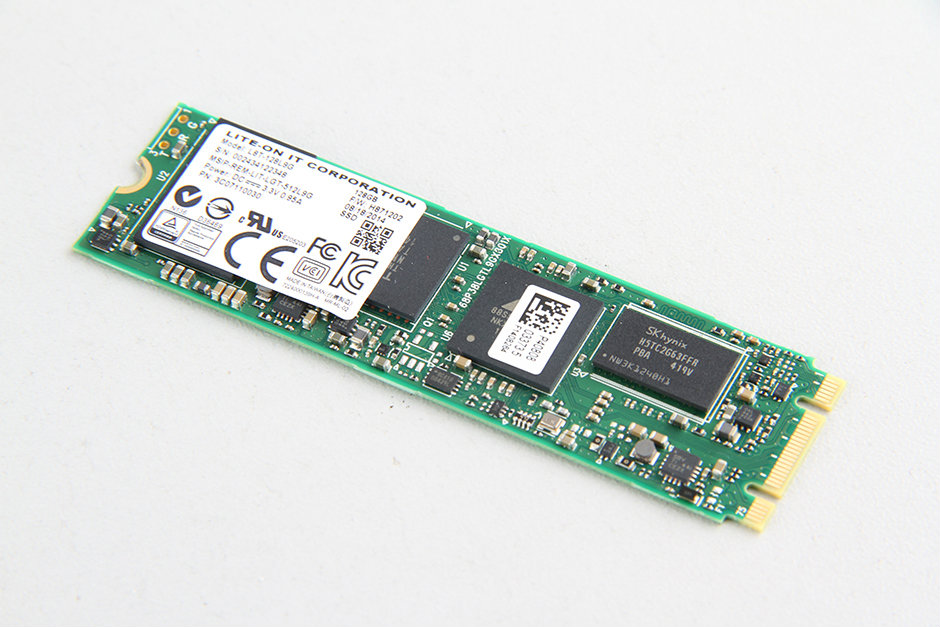
remove one screw securing the SSD, the remove the SSD
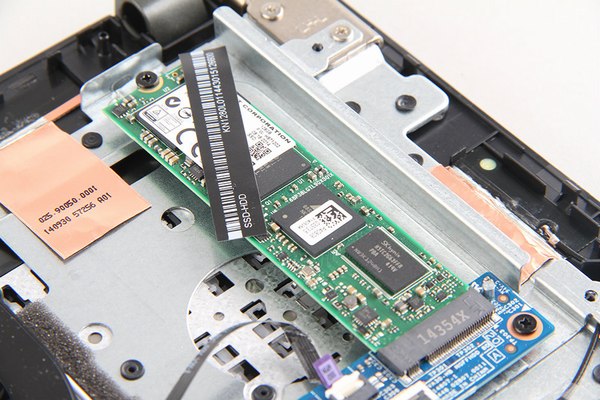
Acer Aspire V3-371 come with a Lite-on 128GB SSD
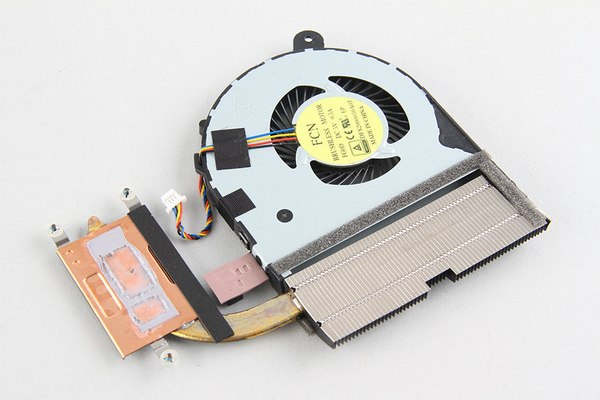
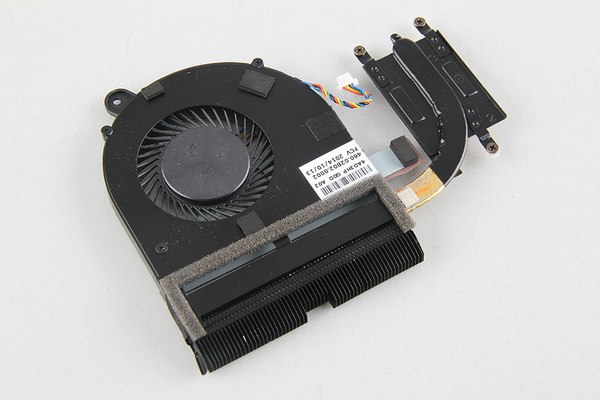
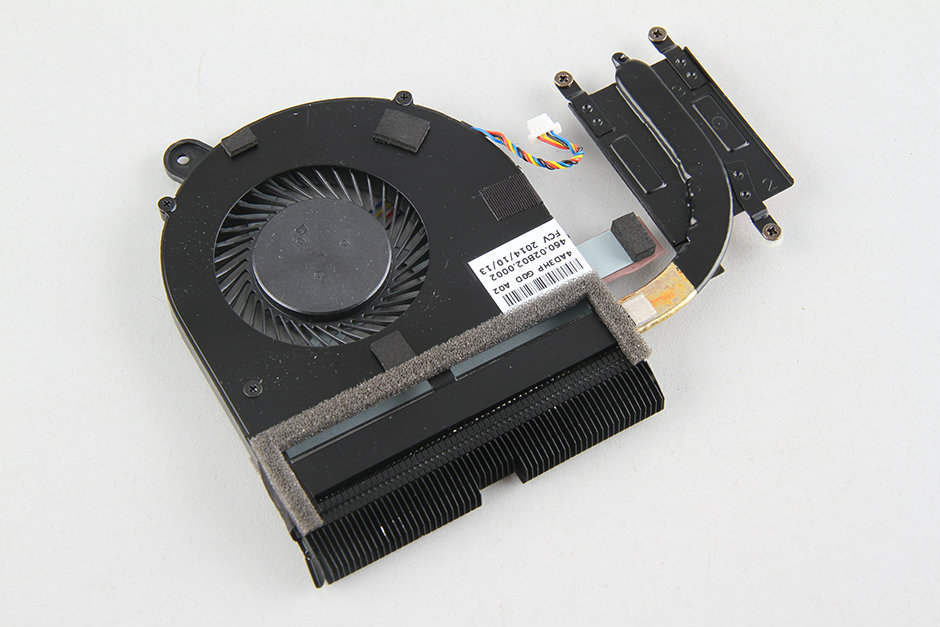
loosen three screws securing the heatsink, remove one screw securing the cooling fan, disconnect the cooling fan cable from motherboard, then the heatsink and cooling fan assembly can be removed
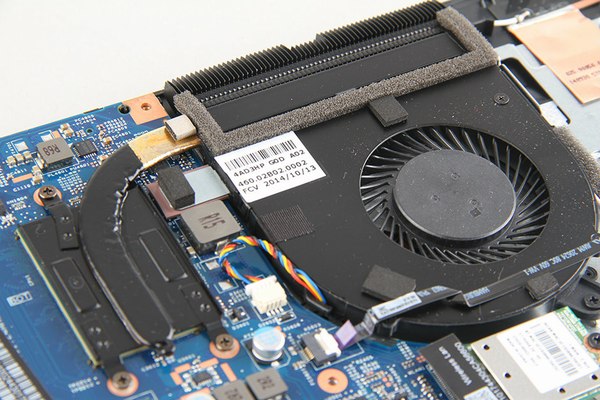
the cooling fan come from Foxconn
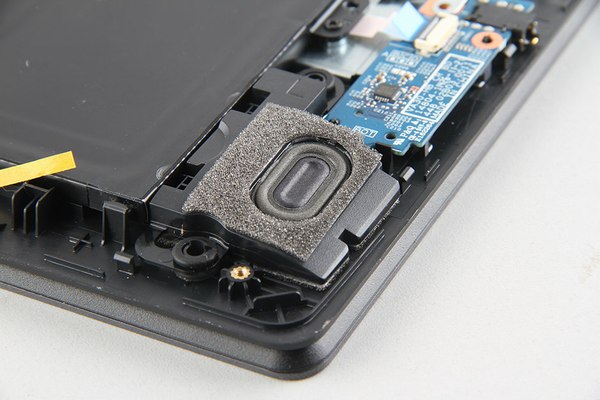
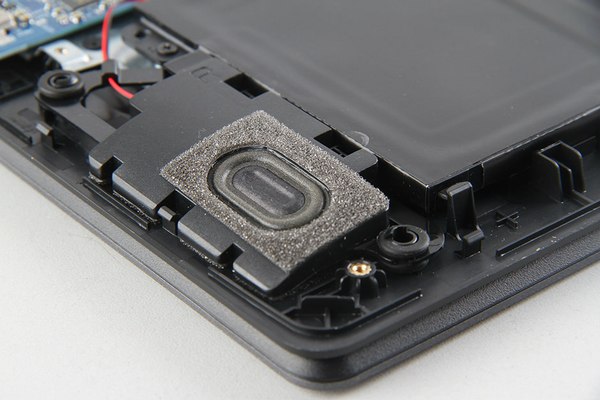
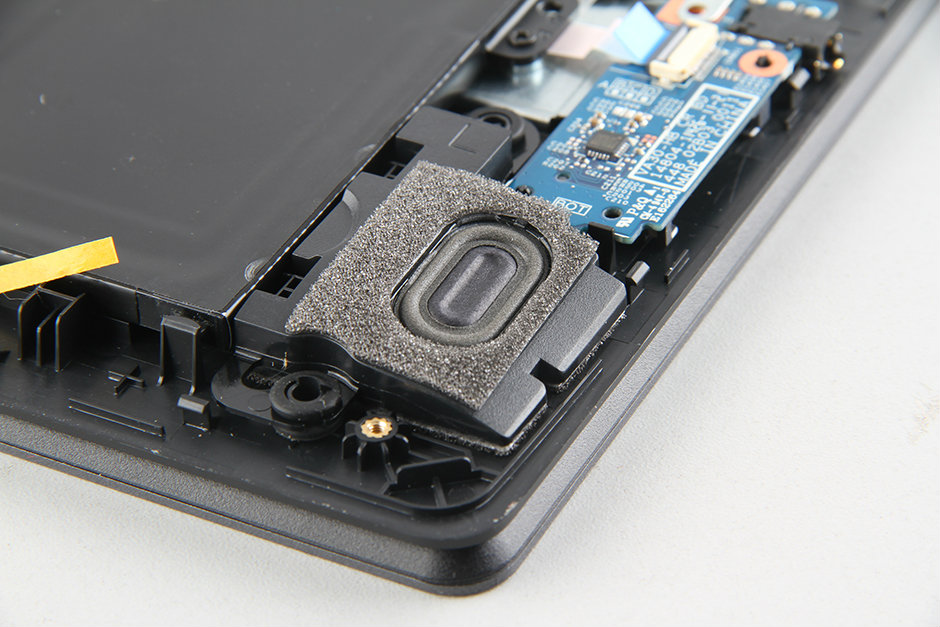
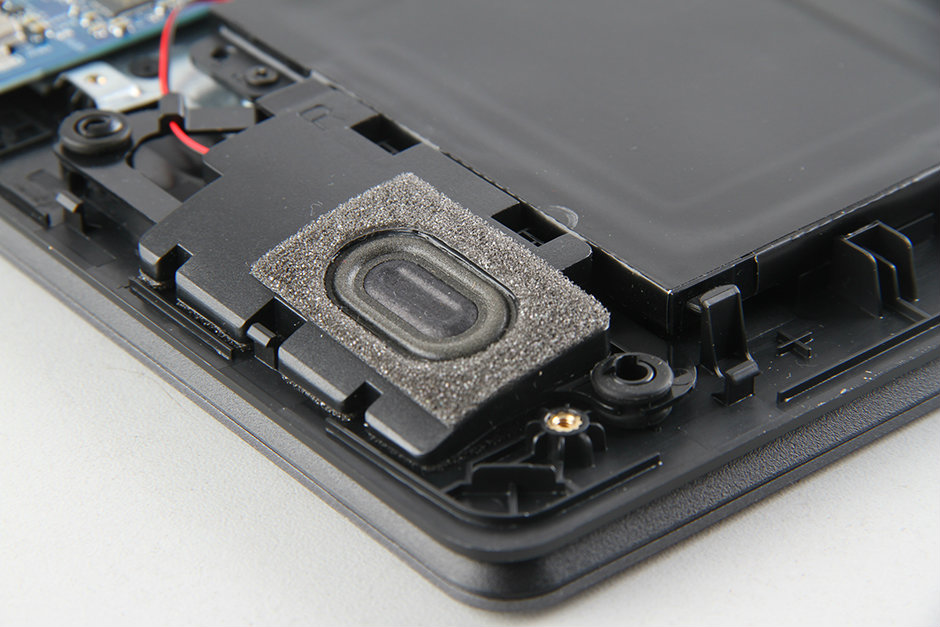
Acer Aspire V3-371 speaker assembly
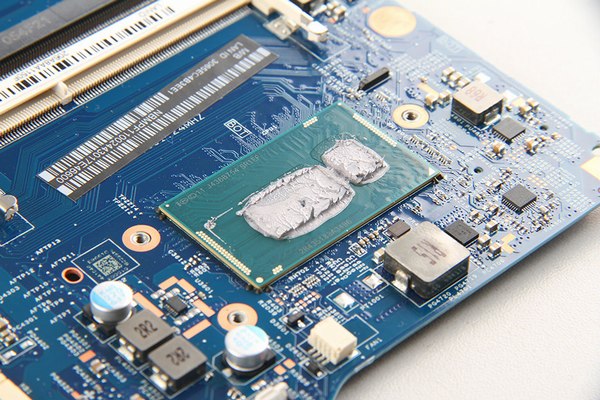
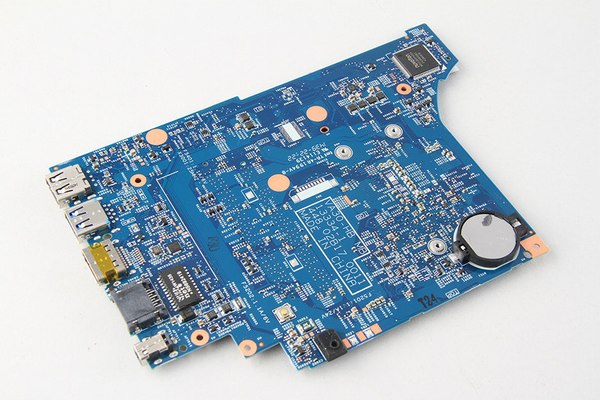
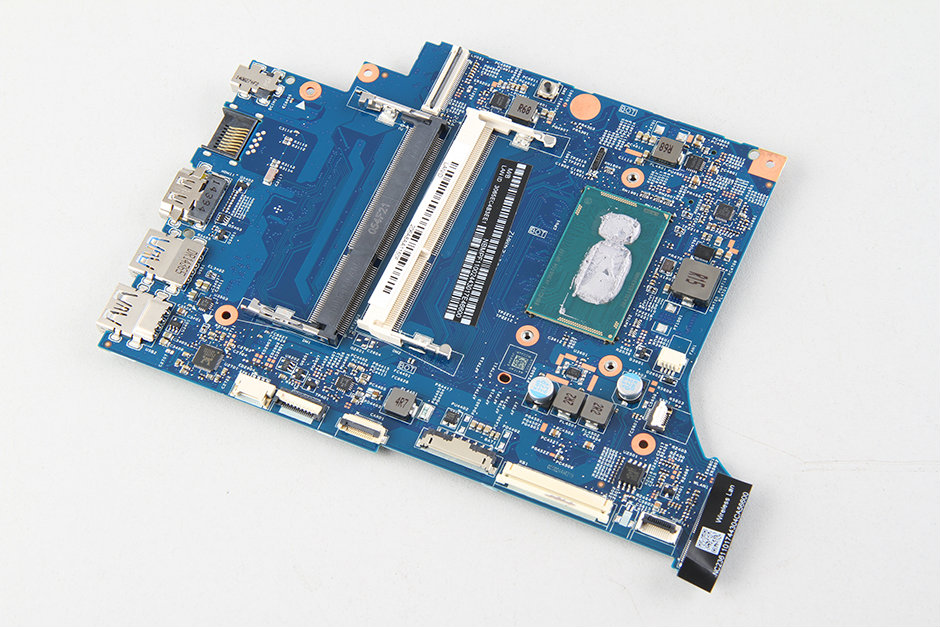
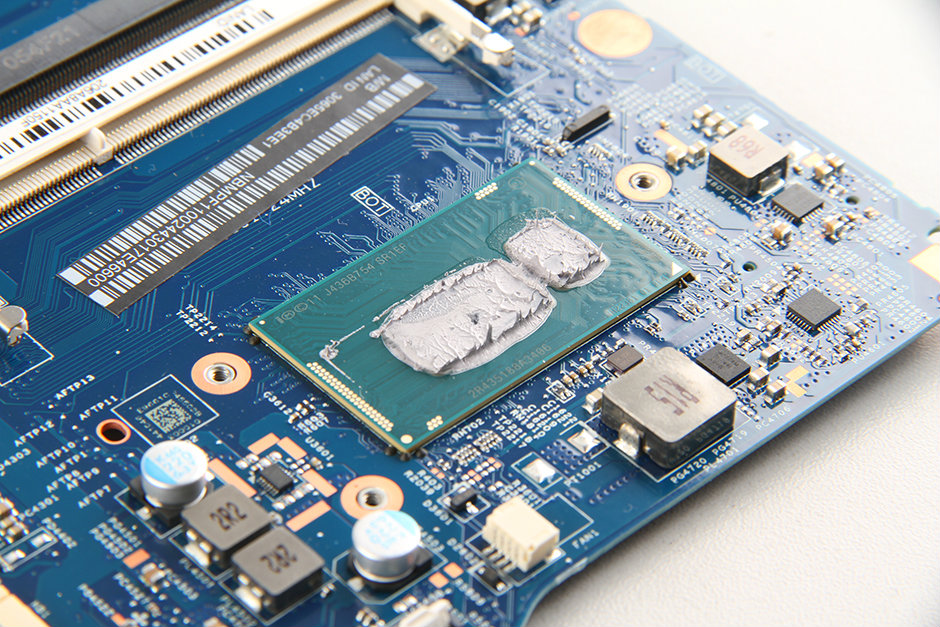
Acer Aspire V3-371 motherboard

the processor is soldered on the motherboard

Acer Aspire V3-371 Teardown Step:
first at all, remove the all screws from bottom case
carefully pry up and remove the bottom case.
once the bottom case was removed, we can access the internal components of the Aspire V3-371

there are some Shock-absorbing sponges on the bottom case to protect battery and SSD.
The internal structure of Aspire V3-371 is very neat, the keyboard cable fixed on the battery by black tape
remove two screws securing the battery, disconnect the battery power cable, then remove the battery.
Acer Aspire V3-371 come with a 15.2v, 3200-3090mah, 48-46wh li-ion battery, acer p/n: AC14B8K
Acer Aspire V3-371 have two RAM slots, buy only one RAM was installed, so you can add another RAM
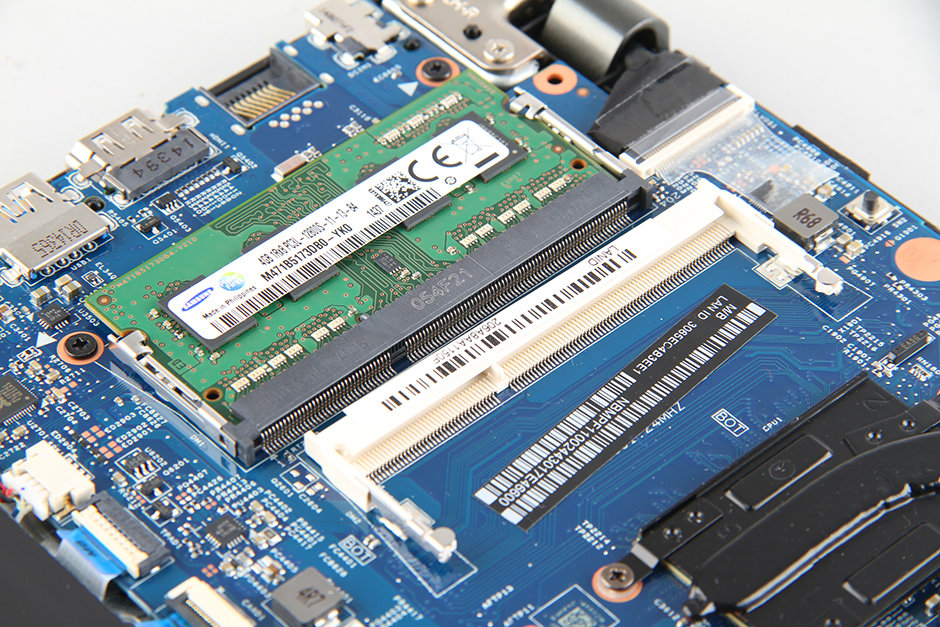
Samsung PC3L-12800S RAM memory

disconnect two antenna and remove one screw securing the wireless card, then take it away from its slot

Wireless lan card model: T77H348.20

Qualcomm Atheros QCNFA222 wireless card
remove one screw securing the SSD, the remove the SSD

Acer Aspire V3-371 come with a Lite-on 128GB SSD

loosen three screws securing the heatsink, remove one screw securing the cooling fan, disconnect the cooling fan cable from motherboard, then the heatsink and cooling fan assembly can be removed

the cooling fan come from Foxconn

Acer Aspire V3-371 speaker assembly
Acer Aspire V3-371 motherboard
the processor is soldered on the motherboard

Hi, can u tell.me.please what type CMOS battery does it require? I need to change mine and I should get one beforehand. Thanks
ReplyDeleteCR2032
ReplyDelete